
As an Amazon Associate, this site earns commissions from qualifying purchases. For more details, click here.
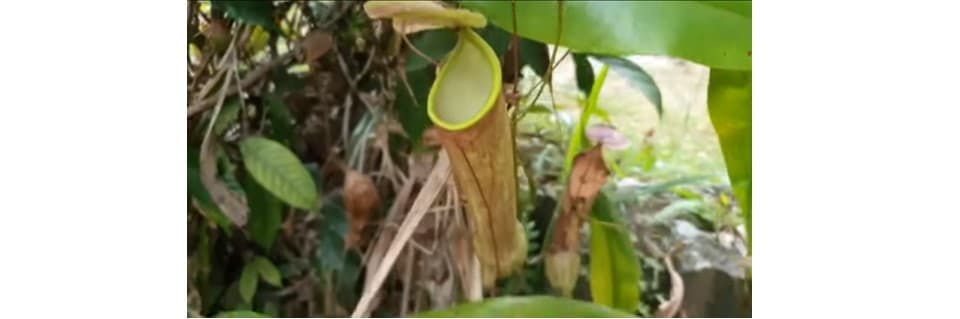
Nepenthes are beautiful tropical pitcher plants and will stand out in your home or garden. If you want to know how to propagate nepenthes, this guide will explain step by step what you need to do. Even if you are a beginner, you should have no problems trying any of these techniques.
The easiest way to propagate nepenthes is through stem cuttings. Cut a piece of stem and plant it in 1:1 sphagnum moss and perlite soil. Cover the pot with a plastic bag and place in a sunlit area. Water to keep the soil moist then repot when growth starts to appear.
There are many other ways to propagate these pitcher plants. Here we will focus on three methods: leaf cuttings, stem cuttings and seeds.
Method 1: Nepenthes Stem Cutting
Most nepenthes owners use the stem cutting method because it is easy and growth is faster compared to other techniques. All you need is a sharp pair of stem cutters or razor, a container and nutrition-free soil, preferably sphagnum moss and perlite. You can do stem cuttings any time of the year..
For the best results, use sharp cutters like the Gonicc Pruning Shears. This allows you to cut the stem with one swift snip and avoid chopping off the rest.
Ready to Grow Carnivorous Plants with Confidence?
Stop guessing and start thriving. Whether you’re raising flytraps, sundews, Nepenthes, or butterworts, this visual-first guide gives you everything you need — from lighting and watering to feeding and seasonal care.
- Beginner-proof diagrams
- Step-by-step routines
- Instant PDF download

Step 1. Cut the stem
Cut a stem with at least 3 leaves and 1-3 nodes (the buds that sprout over a leaf). You should only cut healthy stems with leaves that are well spaced. Cut the stem as near the tip as possible.
Make sure there are still leaves remaining on the stem you cut from so it can regrow. If you want to propagate several nepenthes, you can snip off a whole stem. But do this only if your nepenthes has a robust rosette (the leaves at the bottom of the plant). Do not remove any leaves on the cutting except for the one at the bottom.
Step 2. Plant the stem cutting
Choosing the right soil is important because nepenthes cannot grow in fertilized grounds. With the right potting media, your nepenthes will grow healthy pitchers, which are vital for these plants for various reasons.
Plant the stem cutting in nutrient free soil such as long sphagnum moss and perlite. The mix ratio should be 1:1. Mix thoroughly and pour in a pot. A good choice is Rio Hamza Trading Soil Mix because it is proven to work with carnivorous plants.
Water the soil until it becomes moist. Do not use too much water because it will overwhelm the stem cutting.
Take the cutting and plant it in the soil so at least one node is buried. Root cutting in water is possible but this requires more work as the water has to be replenished constantly.
Step 3. Set up the environment
Cover the potted cutting in a clear plastic wrapper. Make a couple of holes in the wrapper and place it in a well lit location. Partial sunlight is best for new cuttings as direct light is too harsh for now.
Check the plant every day to ensure the soil has not dried out. Lightly spray the plant when the soil shows signs of dryness.
The biggest challenge here is the waiting period. But compared to seeds, this will take less time. It might seem like nothing is happening but if you followed these steps, new growth will appear.
Step 4. Repot the stem cutting
Pitcher plants can live for a long time, but you have to be patient with cuttings. It might take four weeks or more before new growth appears.
When leaf buds sprout, repot the plant. Get a new container, preferably large so the roots can grow. Mix new soil and place it in a well lit area. As the cutting grows, you can increase its exposure to direct sunlight.
With 8 hours of sunlight, water, at least 50% humidity and ideal temperatures (65-85 F), your nepenthes cutting will grow. As long as the leaves are green, it will continue to produce new leaves and eventually pitchers.
Method 2: Nepenthes Leaf Cutting
Leaf cutting or leaf pulling is a widely used propagation method for various plants. You can do this anytime but for nepenthes, it is most ideal during spring.
The process is similar to stem cuttings. The cutting and planting is the easy part, for many the hardest is the waiting. But your patience will pay off and the waiting period is shorter compared to seed propagation.
Step 1. Pull or cut a leaf
If you want to pull a leaf, hold it at the bottom of the stem and pull downwards. Grown leaves can be hard to pull so you should try this on new leaves. You can also use tweezers to snip the leaf off, though you have to avoid cutting into it. Also try not to cut the area where the stalk is connected to the plant base (the crown).
You can cut as many leaves as you want, but make sure there are some left for the mother plant. If you are just starting out, it is best to do just one leaf cutting. Learn how it works and when you have experience, you can do multiple leaf cuttings or pulling.
Step 2. Plant the cutting
Mix 50/50 peat moss and silica sand and pour into a container. Plant the cutting so the stem is buried but not the leaf. Water the plant so the soil moistens, but do not let it get too damp.
Apart from peat moss and silica, you can also use perlite and sphagnum moss. Just like with stem cutting, you can only use nutrient free soil. For more about pitcher plant soil you can use, check out this guide.
Cover the container with a clear plastic bag. Place the covered bag in a well lit spot. Partial sunlight is ideal. It might take up to nine months for any roots to show up, so patience is needed here.
Step 3. Repot the cutting
Repot when new leaves start growing. Get a new pot and mix new soil. Carefully remove the newly grown plant into the new container. As the plant grows, it will need plenty of light. Keep the humidity level up to 75%
Nepenthes do not go dormant so never let the temperature drop to freezing. Keep it above 50 F (10C) or higher. Once the plant matures and produces pitchers, it will start producing nectar and attract prey. You may feed the plant if it is indoors. If you do leave your nepenthes outside, remember to bring it inside before the onset of winter.
Method 3: Nepenthes Seed Propagation
Propagating nepenthes from seeds is easy, but it can take up to three years for a plant to fully mature. If you do not mind the wait, you can try the following.
- Collect nepenthes seeds and store them in a plastic bag. Seal the bag and keep it in your refrigerator until you are ready to plant.
- When you are, take the seeds out of the fridge. Remove them from the bag and let them reach room temperature.
- Get a plastic bag and put sphagnum moss or peat moss in it. Add the seeds and try to distribute them in the moss as evenly as you can. Zip the bag shut, but leave some air in it.
- Store the bag in your refrigerator for five weeks. Some species might require 8 weeks so check the growth instructions. You have to do this with sarracenia seeds to simulate germination.
- After 5-8 weeks, remove the seeds from the bag. Mix silica sand and soil 1:1 in a pot. Place the seeds in the pot, spaced apart by 1.5-2 inches. Add a bit of sand to lightly cover the seeds.
- Place a plastic wrap over the pot. Put the wrapped pot on a sunny window or under fluorescent lights. Spray water to maintain soil moisture.
Now you have to wait. With some species you might see tiny growth within a month. But for the plant to fully mature, you have to wait years. If you are the patient type, this can be a rewarding experience.
Conclusion
Growing and propagating nepenthes may seem like a daunting task, but as we have shown, there are many options available. You decide which one to use, but as long as you follow the steps here, expect new nepenthes to start growing.

My fascination with carnivorous plants began many, many years ago with Venus Fly Traps. Now I am more than happy to impart what I know with other enthusiasts and those who are curious about meat eating plants.

